So you got a power plug or any other device that can measure power, current or the voltage flowing through it. Nice! So did I, and I flashed them with ESPHome since well, that is my firmware of choice for ESP based devices. The problem, however, is that measurements using these DIY methods are rarely accurate.
Fortunately, there’s a solution: You can correct these measurements, right in ESPHome itself, by calibrating your device. In this article, I’ll take you through this calibration process. It is not that hard! I promise.
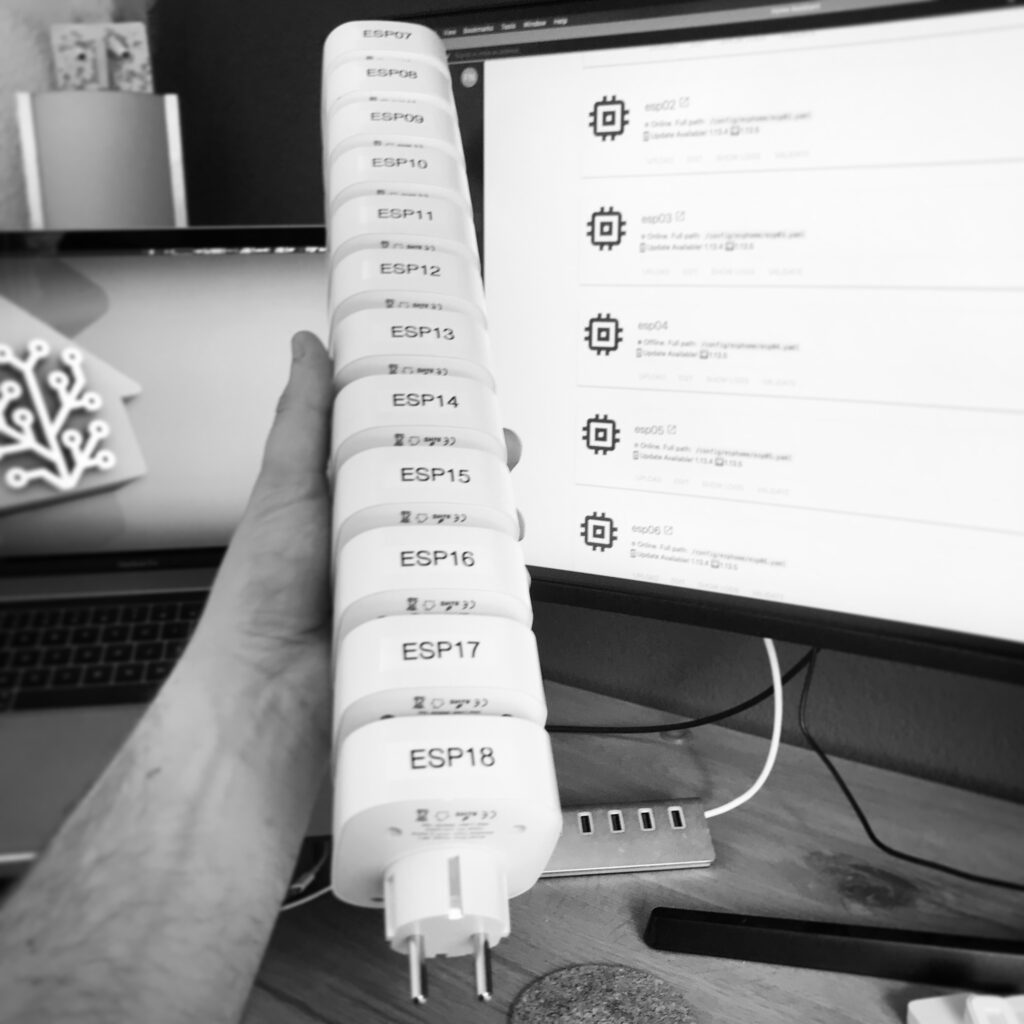
Nevertheless, it is time-consuming. I’ve spent almost six hours flashing & programming twelve wall plugs. For these kinds of things, it is essential to work accurately, to stay calm and check everything twice.
Please note, this article mainly focusses on calibrating, it assumes you are already able to flash your device with ESPHome.
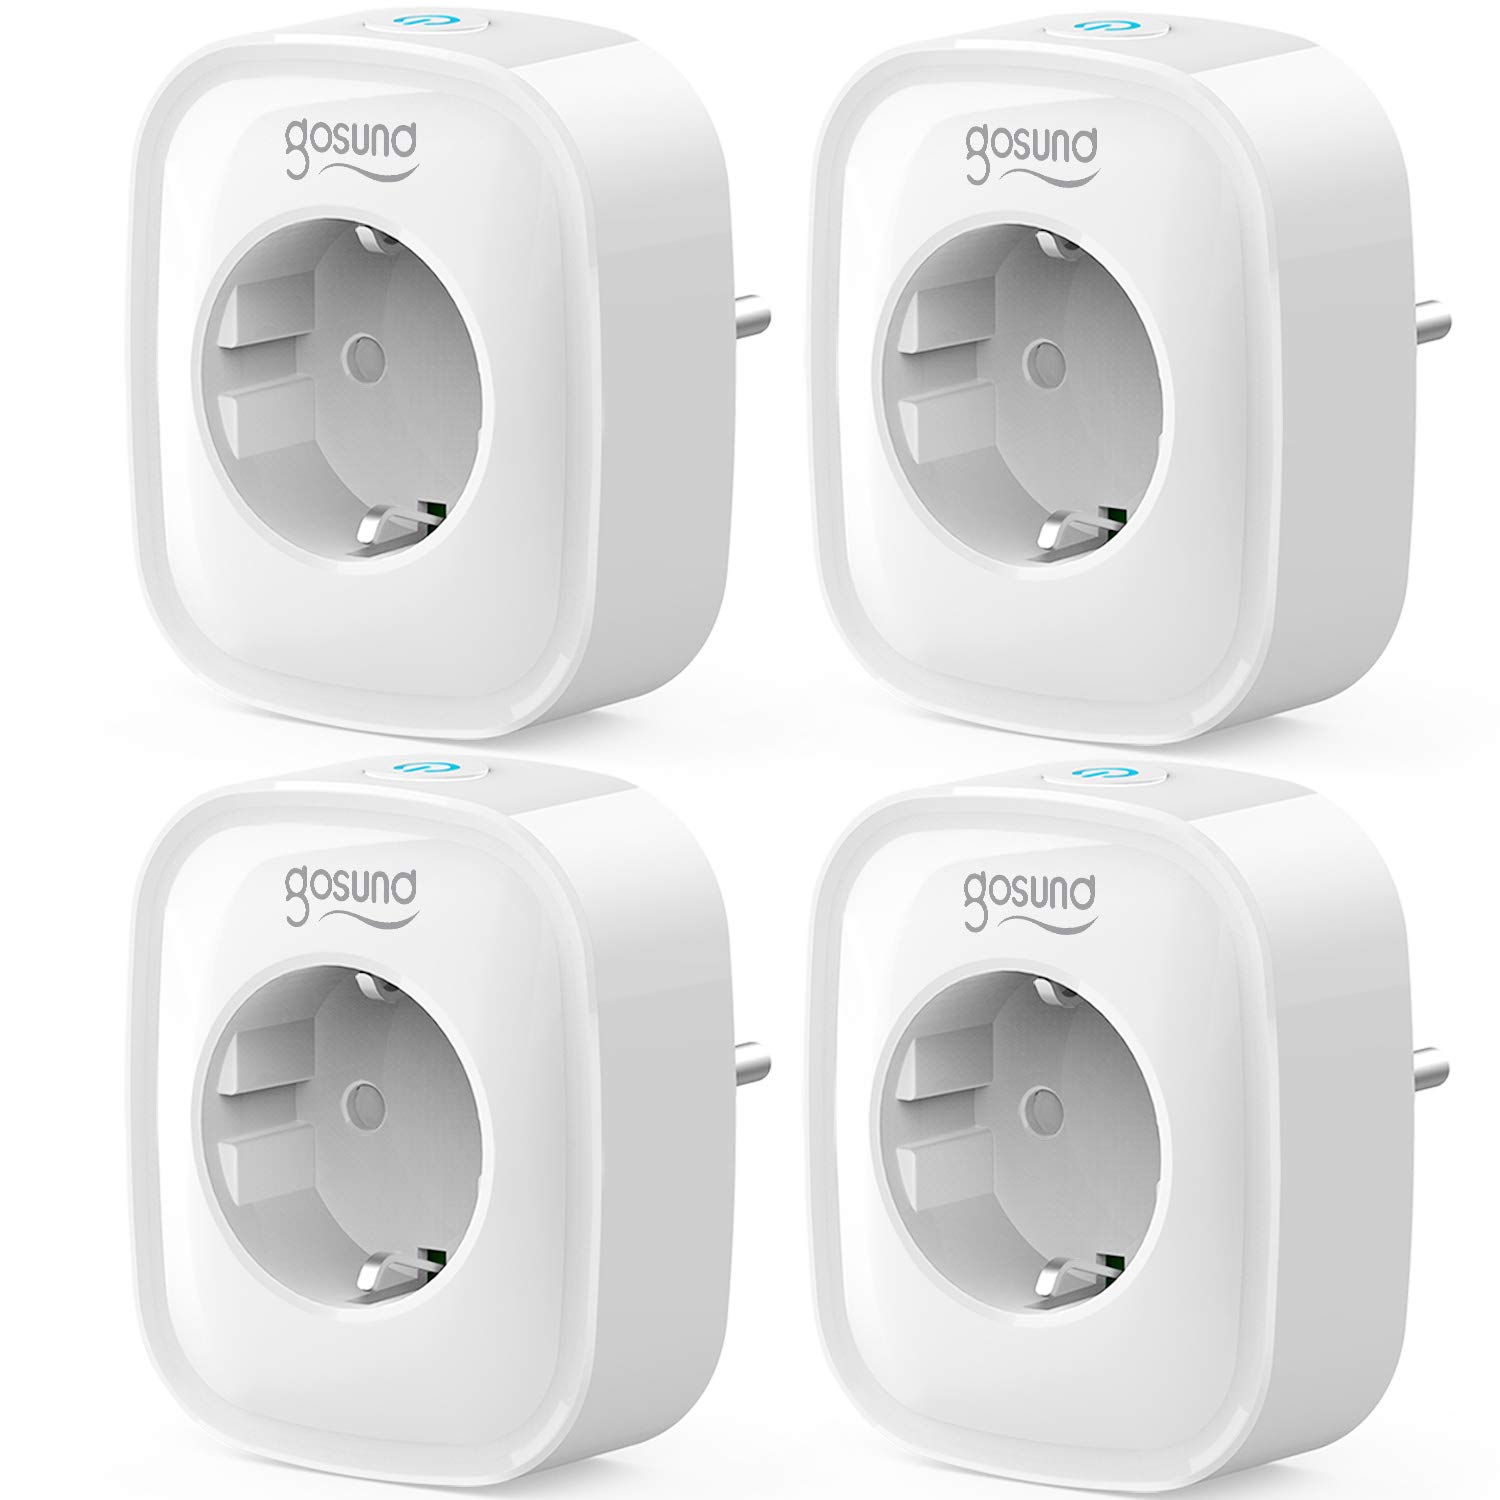
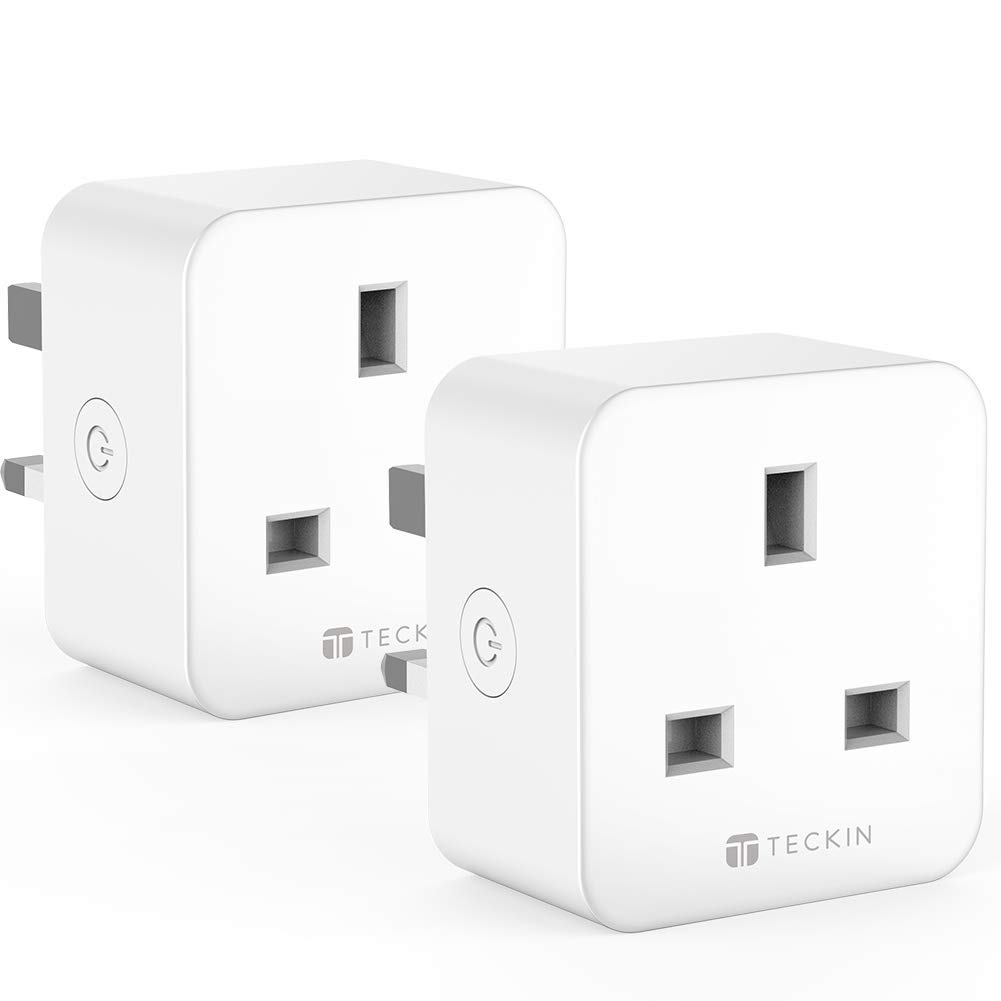
My journey started with some cheap devices by a manufacturer called “gosund”. However, in reality, Tuya makes those devices and are based around an ESP chip. Tuya is a large manufacturer of IoT devices, which are mainly sold white-labeled and are known to be flash-able with custom firmware like, for example, ESPHome or Tasmota.
The price of these devices is truly unbeatable, especially if you take the power measuring capabilities into account. The power measurement abilities open up tons of automation possibilities in Home Assistant, besides just monitoring energy usage. Let me list you a couple of things you could do with them.
- Fridge/Freezer: Alert when no power used in X time: Save the food!
- Dishwasher/Washer/Dryer: Notifications when power drops: Program finished!
- Multimedia/TV set: Monitor hours watched, limit TV use and a standby-killer.
- Waterboiler: Optimize the power use, don’t heat it when not at home.
- Central ventilation box: Turn it off part of the day, when not home.
Besides this all, it is also just a remote switch. So, yeah, basically you can remotely switch and automate anything with a power cord.
Initially flashed my devices using a method called “tuya-convert“.
Stuff you’ll need
Let me kick off real quick here; you’ll need ESPHome. Home Assistant is, of course, lovely to have but not directly needed for what you are doing here. However, you do need:
- ESPHome
- A power meter device
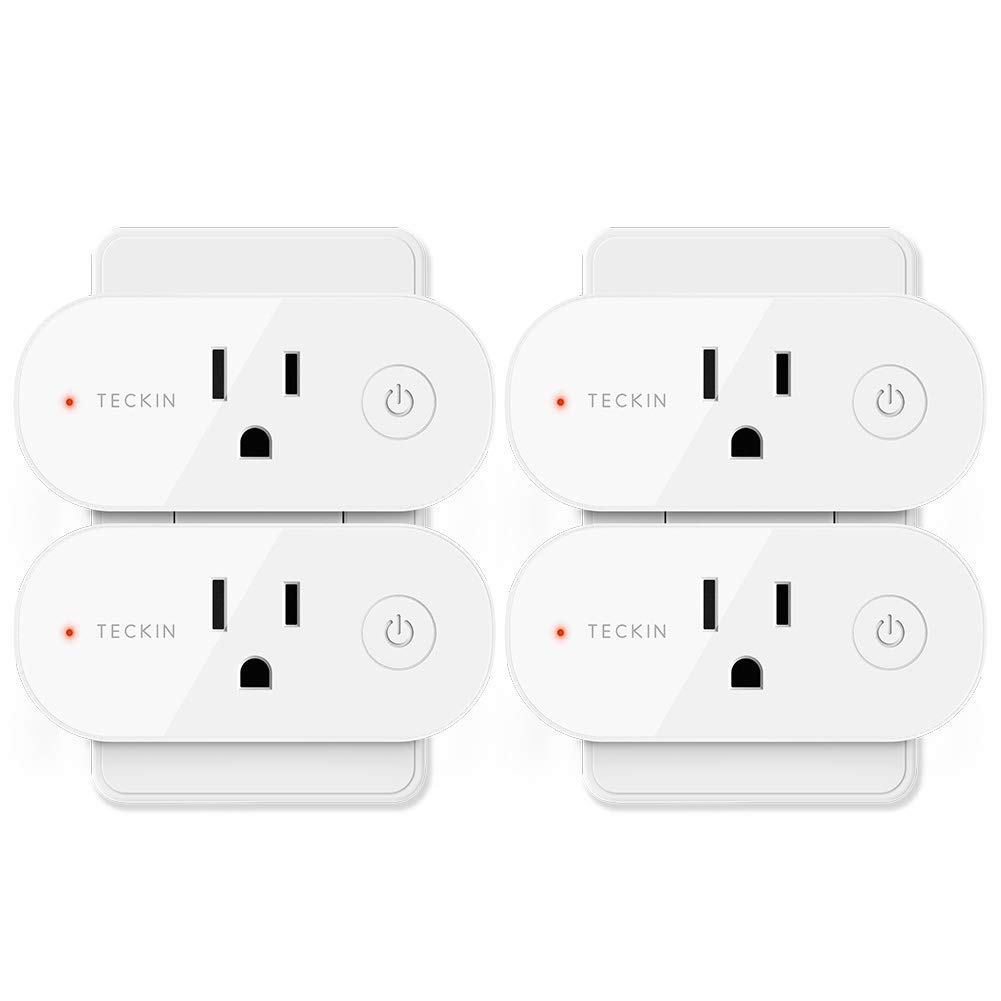
- ESPHome flash-able wall plugs (EU version, UK version, US version)
- A webcam (not required, but helpful. I’ll explain later)
- Multiple devices/appliances that consume power
Power meter
You unquestionably need a power meter device; you have to have a reference point. In general, if you are a home automation enthusiast and don’t own one: Get one! It is a useful tool to have around. I use a Zhurui PR10-C Power Recorder.
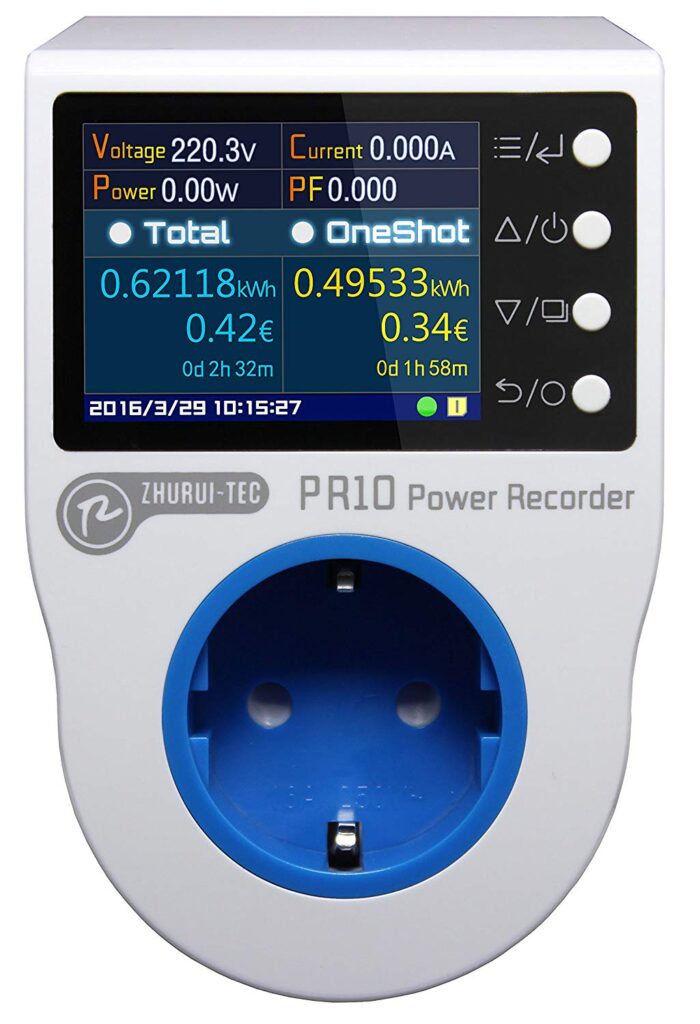
Zhurui PR10 Power Recorder
I use this power meter to calibrate my ESPHome based devices. It is a remarkably delightful device to have in your toolbelt in general. Besides checking current usage, it can also log, record, and even measure the costs of devices plugged in.
It is pretty darn accurate, has a decent build quality, easy to control (didn’t even need a peek at the manual) and a freaking darn sexy display. 😎
Get the Zuhrui PR10-C (EU/DE version)
Get the Zuhrui PR10-F (UK version)
Get the Zuhrui PR10-E (US version)
Get the Zuhrui PR10-D (EU/FR version)
Get the Zuhrui PR10-A (AU version)
Power consuming devices/appliances
To calibrate, you are going to measure the power used by a device using the power meter and your ESPHome device and trying to get them as close to each other as possible. Therefore, you’ll need a couple of devices/appliances that consume power. For a correct calibration, I recommend at least 3 different devices, but more = better.
However, it is crucial that you use devices that consume energy in a low, mid, and high range since this improves the calibration. I recommend using devices that have simple electronics.
Some recommendations:
- A hairdryer, since they usually have multiple fan and heating levels, you can use.
- A vacuum cleaner, bonus if it has a high and low vacuum speeds.
- Old fashioned light bulbs (e.g., 60W).
- (Soldering) Iron (although annoying when it reaches its set temperature).
- A LED flood light (those usually consume around 10-20W).
Even though I recommend a device consuming high power, please be sure you are not overloading the device you are calibrating. Always stay well within the specifications.
More complex electronics are usually not consistent in their power consumption and not recommended. For example, a laptop charger usually has a switching adapter and are just harder to use in this case.
I’ve used a simple LED flood light (around ~10W), a heated iron board (with 2 settings, giving me ~250W & ~265W), a steam iron (steam takes long to heat up, ~2000W) and a vacuum cleaner in low and high fan speed (respectively ~650W & ~1200W).
Flashing the initial firmware
Here you are, ready to go and start of this journey. Start by flashing in some ESPHome firmware on which you base your readings. Chief at this point: ESPHome should NOT do any corrections. You want to be using the actual data from the power sensor in our device.
I’ve created a little starter ESPHome template you could use to flash into your device. It contains the basic needs: enables the power sensor, makes the button on the switch work, toggles to blue LED to indicate the state of the relay and uses the red LED to show the status of ESPHome.
The code in this article uses the hlw8012 sensor, used by the plugs I’ve listed in this article. If your device uses a different sensor (e.g., in a Sonoff POW2), you’ll need to adjust the code a bit. However, the methods in this article still apply.
Setting up for measuring
If you’ve flashed in the above, you should be ready to start creating reference measurements. What you are going to do is pretty simple: You are going to make measurements of appliances hooked up to the wall plug and are going to register what the power meter displays and what your wall socket registers.
Let me walk you through the preparation for creating measurement:
- Plug in your power meter into a power socket.
- Plug in your ESPHome flashed wall plug into the power meter.
- Point your webcam at the power meter display.
- Open up ESPHome and view the log of the power plug (alternatively, visit the plug’s web interface by browsing to its IP address).
- Open up a program on your computer that allows you to view your webcam. If you don’t have any, I would recommend using VLC Media Player.
Please be sure to put the wall plug into the power meter and not the other way around. The other way around causes you to measure the energy of the power meter itself as well, which well, isn’t there forever. Let me show you how it looked when I did it:
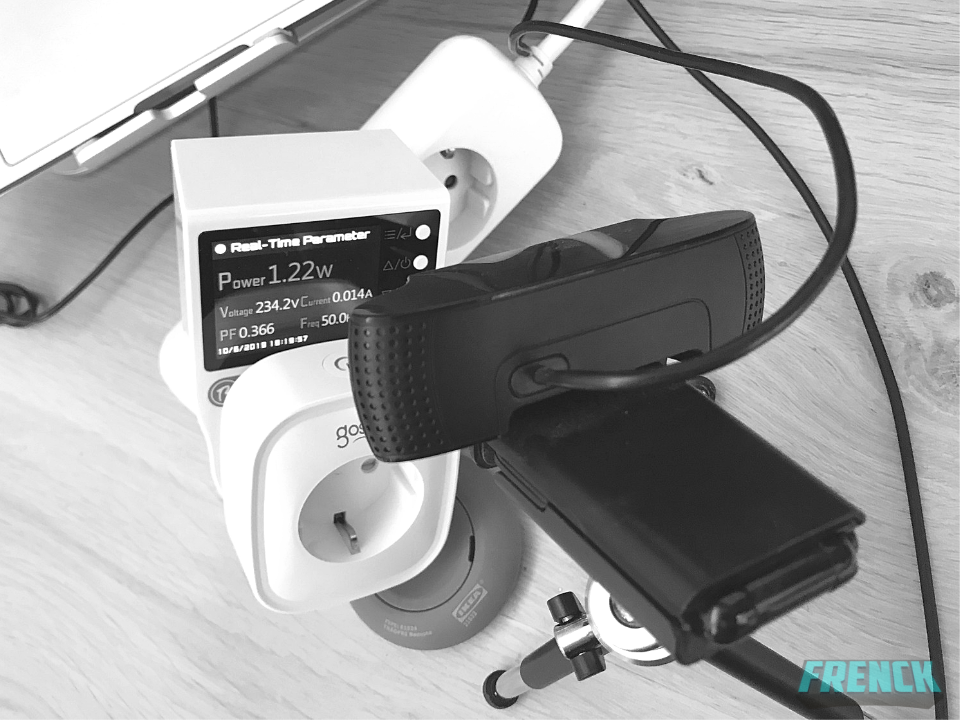
Oh, the webcam! That is a simple and neat trick to get more accurate registrations. So you’ll need to look at the power meter display and ESPHome log output at the same time, and that is hard to do. The webcam, allows you to view both at the same time, and even more convenient, no need to write them down: A screenshot does the job just perfect! Moreover, almost without delay.
Creating reference measurements

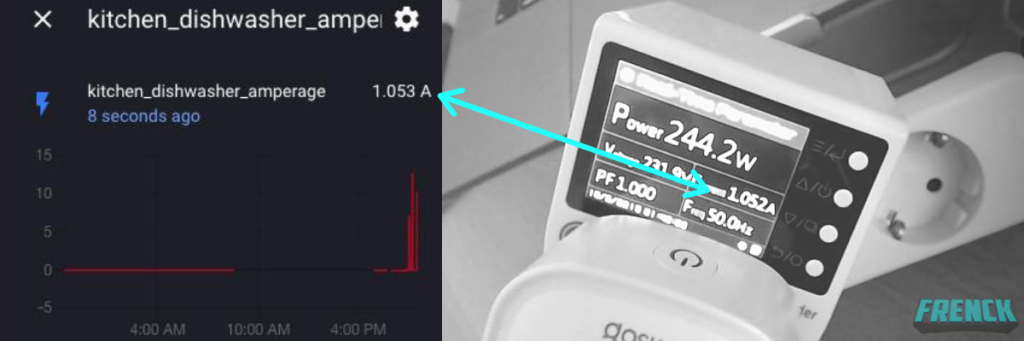
As you can see in the above screenshot, it shows the measurements from ESPHome and the measurement of the power meter. I just waited for the log output to show up and immediately hit the screenshot button. It gave me an instant and the most accurate registration of them both at the same time.
Ready? Go!
- Start without any appliance plugged into your wall plug. You’ll notice the power meter showing about 1 Watt. That is the power used by your wall plug.
- Create a screenshot, just like above of that. You need those starting values later.
- Plug in an appliance, and turn it on.
- Give both the power meter and wall plug a moment to stabilize the measurement.
- Take screenshots of the values as soon as the log in ESPHome pops up (the faster, the better). Please be sure to get screenshots of power, current & the voltage.
- Go to step 3 and start with the next appliance, repeat until you have registered the power usage of all devices.
Right now, you should have ended up with a bunch of screenshots, which should have perfectly registered the value shown by the ESPHome sensor versus the power monitor. That is awesome! Let’s put all this data into ESPHome.
Applying corrections to the firmware
Time to apply all this collected information to calibrate the wall plug. In the previous step we’ve registered: ESPHome sensor vs the power monitor. The great thing is: Exactly what ESPHome needs to calibrate the sensor. Now, you don’t have to calculate anything, just put the collected data into the ESPHome YAML file.
ESPHome has a sensor filter called calibrate_linear. It allows for calibrating sensor values by using the values you measured. By mapping the sensor values to the measured values, ESPHome fits a linear equation to the values using least squares. Don’t worry if that sounded a bit difficult, as I promised: It is easy!
The first registration without an appliance plugged in, is imperative. It gives you the base power (Watt) and current (Amps) that the power plug itself uses. Those values you can use to correct the measured values by subtracting before sending out those values. Unless, of course, you want to register both the plug and the appliance.
So here is an example of what the power sensor in the YAML files looked like after I’ve put in the registered values:
As you can see above, I’ve put in a list of ESPHome values mapped to the power meter values. ESPHome uses this mapping to correct the data registered by the wall plug sensor to the correct and real-world value. I’ve also added a small lambda filter, that finally subtracts the power usage of the wall plug itself.
Next, do the same for the current sensor:
The voltage sensor is a bit different. You need to start with a 0 -> 0 reference since you have to assume, zero is zero. There is no way you can measure a zero value. Also, there is no additional filter for subtracting a base value, since well, the power consumption of the wall plug does not affect the voltage in this case.
And now, you’re thinking: “Nice Frenck, but how does this look like when I’ve put it all together?” Merging the initial firmware and these calibrations, results in: calibrated_firmware.yaml
You did it! Nice! Upload your new firmware into your wall plug: Time to put it to the test.
Check the results
Checking the results is probably the most logical thing to do next. Keep the wall plug plugged in into the power meter, since well, you want to verify it, right? Plug an appliance into the wall plug and compare the output of ESPHome with the power meter. Alternatively, you can also add it to Home Assistant and watch the sensors from there.
In my case: Perfect! Amazing, isn’t it? Expect some small deviations, but you should be pretty close. However, if the deviation is too significant for your taste, you’ll have to start over again. Be sure you are using stable appliances for the reference measurements and take a good look at your screenshots if you can find the measurement that caused the deviation.
The final product
If all went according to plan, you should have ended up with a pretty decent calibrated wall plug! I’m sure you’re with me on this one: Time to start monitoring your energy usage and automating things 😬.
During writing this blog, I received an question on social media:
Frenck! Why calibrate them all? Once you have one calibrated, you can use the same profile on all the plugs, right?”
True! You could save yourself a lot of time since, in theory, you can reuse the mapping with all devices of the same brand and type. However, during my testing, I noticed there were small deviations visible. You guessed it… I decided to calibrate each plug individually.
One more thing, you could consider extending the firmware, you’ve just created, with more features. Consider adding:
- API & OTA passwords for more security
- Time synchronization with Home Assistant
- Sensors for:
- Current running ESPHome version
- The IP address of your devices
- The WiFi BSSID & SSID it is connected with
- WiFi signal strength
- Uptime sensor
- Daily used energy
- A switch to restart your device with
If you want to find out what my final version looks like, be sure to take a look at: final_firmware.yaml
../Frenck
This blog was inspired by the “10$ WiFi Energy plug meters with ESPhome” YouTube series by Intermit.Tech.